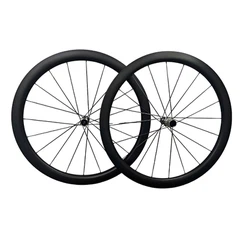
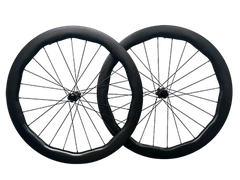
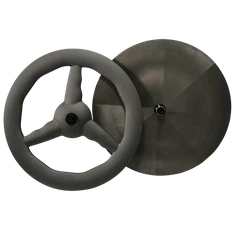
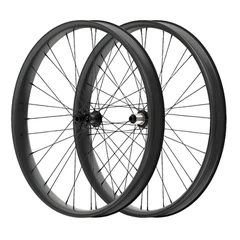
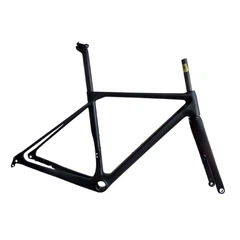
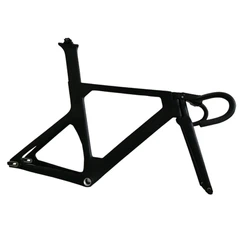
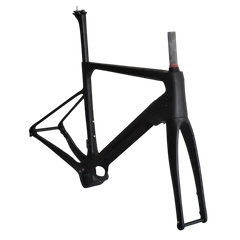
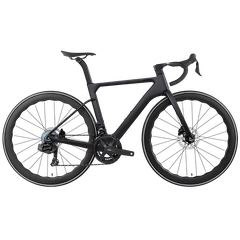
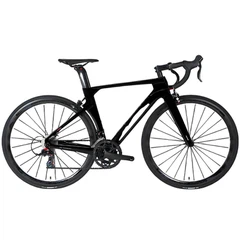
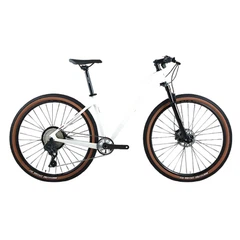
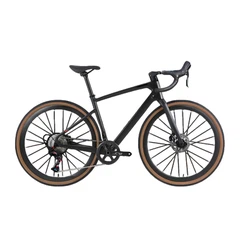
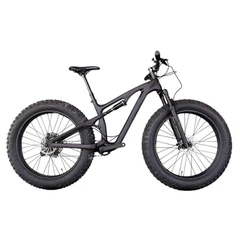
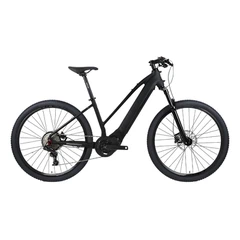

The selection of the tire-wheel system is more than ever before on a carbon fiber bike. The new carbon rims are different in response to the heat, impact, and mounting force as compared to the old alloy rims. The bad tire type or configuration can negatively affect the ride comfort, either making flats more difficult to repair or even the destruction of an expensive rim. The perfect fit, however, has all the potential of opening free speed, enhanced grip, and reduced fatigue during longer rides.
Most riders pick from three systems: clincher, tubeless, and tubular. A clincher tire uses an inner tube and hooks into the rim bead. A tubeless tire locks into a sealed rim bed and holds air with liquid sealant, no inner tube inside. A tubular tire is sewn around a tube and then glued or taped to a special rim with no bead hook at all.
This guide walks through how each system works and what that means on the road. You will see how rolling resistance, weight, and aerodynamics compare. You will see what it takes to mount, fix, and live with each choice. You will also see how the total cost adds up, not just on day one but over two years.

System Comparison at a Glance
Rapid scan assists you in making a quick selection. Compare how each of the systems is built regarding speed, weight, cost, flats, and daily work. Select the characteristics that you value most of all, followed by reading the in-depth areas.
| Criterion | Clincher | Tubeless | Tubular |
| Rolling resistance | Very low with top tire + good tube | Very low; no tube friction | Low to medium; depends on tire make |
| Weight at the rim | Tube adds grams | Sealant adds grams; no tube | Light rim + light tire + glue |
| Upfront cost | Lowest (common rims, cheap tubes) | Medium (tape, valves, sealant, tires) | Highest (special rims, pricey tires, glue) |
| Ongoing cost | Tubes and tires | Sealant, refresh, tape, plugs, tires | Glue/tape each swap, new tires after flats |
| Puncture protection | Fair; the tube can pinch or puncture | Strong sealant fixes small holes | Good vs pinch flats, but cuts still stop you |
| On-road repair speed | Fast: swap tube, ride | Medium: sealant/plug, or add tube | Slow: sealant shot or full tire swap |
| Setup difficulty | Easy | Moderate: seat beads, seal, shake | High: clean rim, layer glue, align tire |
| Maintenance load | Low | Medium: Check the sealant every few months | High: re-glue, clean rims, store spares |
| Comfort at low PSI | Limited by pinch flats | Excellent; run lower PSI safely | Excellent; no bead pinch, supple feel |
| Cornering security | High with the right pressure | High bead locks, low PSI helps grip | Very high if the lue is perfect |
| Heat risk on rim brakes | Higher (tube blowout risk on hot rims) | Similar to a clincher on rim brakes | Lower; no bead hook, but the glue can soften |
| Ideal use cases | Daily training, commuting, and budget builds | Gravel, fondos, crits, long rides with few flats | Pro racing, purists, weight weenies |
| Spare you carry | 1 tube + levers | Plug kit + 1 tube (backup) | Pre-glued spare tire (bulky) |
| Mess factor | Low | Medium (sealant) | High (glue) |
Wheel & Tire Technologies Explained
Clincher Systems
A clincher tire has two beads that go inside the rim's hook. A vacation boat has been screwed between the tyre and the rim bed. You blow up the tube, and the tube pushes the tire out, and then the beads lock in place, and the tire holds its shape.

On a carbon rim, the hook shape and bead seat must be precise. If the bead slips, you can blow a tire off the rim. Modern carbon clincher rims use reinforced bead hooks and pressure limits to control that risk. Running the right tire width and the right pressure helps.
Heat can be a concern on carbon rims under long brake drags on descents (with rim brakes). Heat can soften the resin in the carbon and lead to a blowout. Many riders moved to disc brakes, which pull that heat off the rim. If you still run rim brakes, be careful with long drags and use pads that match your rim maker's specs.
Mounting a clincher is simple. Slip one bead over, tuck the tube in, then lever the second bead. Pump it up. Carry a spare tube on each ride. If you puncture, you pull the tire off one side, swap in a tube, and go.
Tubeless Systems
A tubeless tire seals air directly to the rim bed. The rim bed has no spoke holes or uses a tight strip or tape. The tire bead must "snap" into place. Liquid sealant coats the inside and plugs small holes as they form. You need a valve that seals to the rim bed. Some rims are "tubeless ready," which means they have the right bed shape and need only tape and a valve. Others come as full "tubeless" rims with molded beds and no tape.
The biggest hurdles are initial sealing and maintenance. You often need a strong blast of air (from a compressor or a pump with a charge chamber) to seat the beads. You shake and spin the wheel so the sealant coats the inside. You check and refill the sealant every few months, since it dries and loses its effectiveness.
Once set, tubeless tires can roll fast at lower pressures because no tube rubs inside. Lower pressure improves comfort and grip. Sealant fixes many small punctures that would flatten a tube. However, when a major cut occurs, you still need a backup plug or tube.

Tubular Systems
A tubular tire has a tube sewn inside a fabric casing. The tire glues or tapes onto a rim with no bead hooks. You stretch it on, align the tread, then press it down. The glue cures and forms a bond.
Race pros have used tubulars for decades due to their low weight and superior feel. You can run them at lower pressure without pinch flats because there is no bead to pinch. The ride feels smooth and direct. Cornering can feel secure because the round casing stays in constant contact.
The downside is clear. Glue work is messy and slow. You need a clean rim bed, the right glue, thin layers, and a cure time. On the road, if you flat, you either ride it soft to the pit or you peel it off and put on a pre-glued spare. That means you must carry a whole tire, not just a tube.
Carbon tubular rims are light because they do not need bead hooks. But you can damage the rim bed if you pry too hard or use harsh solvents to strip old glue. Careful prep and clean work extend rim life.

Performance Deep Dive
Rolling Resistance & Efficiency
Rolling resistance comes from how the tire casing flexes, how the tube or sealant interacts, and how smooth the contact patch runs. In general, a high-quality clincher with a supple casing and a latex or high-end butyl tube rolls very fast. Tubeless can match or beat that, because it removes the friction between the tube and the tire. Sealant adds a little drag, but the gain from no tube often offsets it. Tubulars can roll very fast, too, but many modern tests show the best clinchers and tubeless tires now beat most tubulars in pure rolling resistance.
Pressure also matters. Too high and you waste energy bouncing off small bumps. Too low and you get extra casing flex. Tubeless lets you find a sweet spot more easily because you fear pinch flats less. Clinchers with tubes need a bit more pressure to guard against pinch flats. Tubulars also allow low pressure, but glue quality and rim bond must be solid to prevent the tire off in a hard corner.
Weight & Rotational Mass
Weight at the rim matters most because it spins with every wheel turn. Tubular rims can be lighter since they skip bead hooks. A high-end tubular tire is often light. Add the glue, and the total can still sit below many clincher setups. But modern carbon clincher and tubeless rims keep closing the gap.
Clincher systems carry the added weight of an inner tube. Tubeless drops the tube but adds sealant and a heavier bead in some tires. In real terms, differences often come down to a few dozen grams. That is not much unless you race climbs or sprints where every gram at the rim counts.
For a carbon build, you should also count the spoke count, nipple type, and even valve stem weight.
Aerodynamics & Speed
Aerodynamics depends on rim depth, tire width, and how the tire mates to the rim. A tire that is too wide compared to the rim can add drag. A good match between tire and rim width makes smoother airflow. This holds across all three systems.
Tubeless and clincher tires often share the same casings, so aero results look alike when widths match. Tubular tires can have a rounder profile. Some wind tunnel work shows slight gains or losses with tubulars, depending on rim shape. In practice, the system itself (clincher, tubeless, tubular) matters less than the tire width, rim depth, and the way the two blend.
Comfort & Vibration Damping
Comfort comes from lower pressure and flexible casings. Tubeless shines here because you can drop pressure without pinch-flat risk. The sealant also adds a small damping effect. Clinchers can feel almost as smooth if you run a high-volume tire and accept a bit more pinch-flat risk or use tough rim strips. Tubulars feel "alive" on rough roads because the sewn casing flexes well. That said, the difference between a top tubular and a top tubeless tire on a wide carbon rim is smaller than ever.
Vibration damping is more than comfort. It reduces muscle fatigue and can keep you fresh on long rides. If your carbon frame and fork already smooth a lot of road buzz, the tire choice still adds a final layer.
Cornering Grip & Handling
Grip comes from rubber compound, tread design, and casing flex. All three systems use similar rubber compounds at the high end. The difference is how low you dare go on pressure and how secure the tire sits under side load.
Tubeless lets you run lower pressure for a larger contact patch, which helps grip. Clinchers can also grip well if you pick a good compound and manage pressure. Tubulars can grip very well because they do not burp air under side load, and the casing stays round. But a bad glue job kills that advantage.
Carbon bike rims with wide internal widths help all systems by shaping the tire into a short, wide contact patch. That improves grip and reduces squirm.
Durability, Repair & Maintenance
Puncture Resistance & Flats
Tubeless wins here for most riders. Sealant plugs small holes fast. You often hear a hiss, see a dot of sealant, and keep riding. Large cuts still stop you, but you can plug them with a tubeless plug tool. Clinchers rely on tube thickness and tire casing. You can add tough liners or thicker tubes, but that adds weight and rolling resistance. Tubulars resist pinch flats, but a sharp object can still cut the casing and tube.
Rim damage is a different story. A hard hit on a carbon rim can crack a bead hook (clincher/tubeless) or dent the rim bed (tubular). On gravel or rough roads, lower pressure reduces those peak impacts. Tubeless makes that pressure drop easier. Clinchers can go lower if you use wide tires and stay alert.
Emergency Repairs
Clincher: pull the wheel, lever one side, replace the tube, inflate, ride. It is quick and simple. Most group rides assume this fix.
Tubeless: first, try to spin the wheel and let the sealant plug the hole. If it fails, push in a plug. If that fails, pull one side of the tire off, stick in a tube, and ride home. This is messier but still doable. Carry a tube, a boot, and a plug kit.
Tubular: if you flat, you can squirt in sealant through the valve if it is removable. That might work. If not, you must peel the tire off and put on a spare you glued ahead of time. That takes time, strength, and care to align it. Many riders with tubulars call for a ride home instead.
Rim & Tire Longevity
Carbon rims have a long life, provided you take care of them by not overheating them and being careful not to have large impacts against them. Clincher/tubeless rims with 'bead hooks' can also chip out on levering, unless you take care. Instead of steel levers, use the ones made of plastic.
Tubeless tape must stay intact. If it lifts or bubbles, the system leaks. Replace tape when it looks worn. Sealant leaves dried latex inside the tire and rim. Clean it out once or twice a year.
Tubular rims need glue cleanup. Strip old glue with safe solvents, not harsh chemicals that could soften carbon resin. Tire base tape can tear during removal. Go slow and warm the glue with friction to ease the peel.
Tires wear out from tread wear, cuts, and UV light. Tubeless tires can get dried sealant clumps. Clincher tires get flat spots with skids. Tubulars can rot if stored damp. Store all tires in a cool, dark place.
Cost Breakdown
Upfront Costs
Clinchers: rims are common and often cheaper. Tires and tubes are cheap. You need only basic tools. If you already ride clinchers, changing nothing costs nothing.
Tubeless: rims may need new tape and valves. Tires cost more than many standard clinchers. You need sealant. A good pump or compressor helps. The extra bits add up, but not by a lot if you spread them over a season.
Tubulars: You need new rims. They are not cheap. Tires cost more than clinchers and often more than tubeless. You need glue or tape and time to learn the process. Upfront, tubulars hit the wallet hardest.
Consumables & Ongoing Expenses
Clinchers: tubes, rim strips, and tires. If you flat a lot, tubes add up. If you use high-end latex tubes, the cost rises. Tires with puncture belts cost more but last longer.
Tubeless: sealant refresh every 2–4 months, new tape when it leaks, plugs for big cuts. Tires may last longer because sealant saves some flats, but sidewall cuts can still kill a tire. Valves last, but you may need new cores.
Tubulars: glue or tape per tire change, plus time. If you flat and cannot fix it with sealant, you often scrap the tire. That hurts the budget.
Total Cost Over Two Years
Add it all up: two sets of tires a year, tubes or sealant, repairs, and lost ride time. For most riders, clinchers are the cheapest. Tubeless falls in the middle. Tubulars cost the most. But if you race and value the ride feel of tubulars, you may accept that cost. If you hate flats and value time saved on the roadside, tubeless could pay back in fewer delays.
Think about hidden costs: missed rides because the sealant dried, or extra shop fees to mount tubulars. Your time has value, too.
Advantages and Disadvantages of Clincher, Tubeless, and Tubular
This section breaks down the key pros and cons of each tire–wheel system. Use it to weigh what matters most-ease of use, ride feel, or repair speed.
Clincher
Advantages
Easy installation: Mounts with simple levers and a tube.
Fast roadside repairs: Swap a tube in minutes.
Low upfront cost: Rims, tires, and tubes are widely available and budget-friendly.
Broad tire choice: You can pick from dozens of tire models and widths.
Simple tools: You need only basic pumps and levers.
Disadvantages
Higher flat risk: Inner tubes pinch or puncture more often.
Tube friction: The tube rubs inside the tire, adding a bit of drag.
Pressure limits: You must run higher pressures to avoid pinch flats, which can reduce comfort.
Weight penalty: The tube adds grams at the rim.
Heat sensitivity (rim brakes): Tube blowouts can occur on very hot rim surfaces.
Tubeless
Advantages
Self-sealing: Sealant plugs small holes instantly.
Lower pressure: You can run lower PSI for better comfort and grip.
Improved rolling resistance: No tube friction often yields a marginal speed gain.
Fewer flats: Sealant handles most punctures without a stop.
Light tube-free build: You drop tube weight, offsetting some sealant grams.
Disadvantages
Complex setup: Seating beads and sealing rims take extra steps and tools.
Sealant maintenance: You must top up or replace sealant every few months.
Mess factor: Sealant can spill during repairs or mounts.
Higher initial cost: You need tubeless-ready rims or tape, valves, and sealant.
Backup gear needed: You still carry plugs and a tube for large cuts.
Tubular
Advantages
Lightest option: No bead hooks on the rim; very light tire and glue.
Premium ride feel: sewn casing flexes nicely over rough surfaces.
Low-pressure use: You can run very low PSI without pinch flats.
Strong cornering: The tire stays glued under high side loads with no burping.
Disadvantages
Time-consuming setup: Cleaning, gluing, and curing take hours and skill.
High cost: Special rims, tires, and glue drive up the price.
Poor roadside fix: You must carry a pre-glued spare tire, not just a tube.
Messy glue work: Solvents and old glue cleanup risk rim damage.
Limited tire choice: Fewer models and widths compared to clincher and tubeless.
Installation & Setup Guide
Clincher Tire Mounting
Start with a clean rim and a good rim strip that covers spoke holes. Put one tire bead on the rim. Add a bit of air to the tube so it holds shape, and slide it into the tire. Tuck the second bead on. Use your hands first. If you need a lever, use plastic and avoid pinching the tube. Check that the tube is not caught under the bead. Inflate slowly, seating the bead evenly. Spin the wheel and look for hops or bulges. Adjust before full pressure.
Tubeless Build
Make sure the rim is sealed. Lay tubeless tape tight across the bed with a smooth overlap at the valve hole. Pierce a small hole for the valve. Insert the tubeless valve and tighten the nut.
Mount the tire with no sealant first to dry-fit. Pop the beads into place with a strong blast of air. If it seats, deflate, pop one bead off, and pour in the sealant through the open side or through the valve if the core is removable. Reseat the bead. Inflate to a bit above riding pressure to snap the beads. Shake and roll the wheel in all directions to coat the inside.
Let it sit for a while and check for leaks. Top off air as needed. Wipe off any sealant drips.
Tubular Gluing
Prep the rim. Remove old glue with a safe solvent and a scraper that will not scratch carbon. Wipe clean. Apply a thin coat of glue to the rim bed. Let it get tacky. Apply a thin coat to the tire base tape. Let it get tacky. Apply a second thin coat to the rim. While it is tacky, stretch the tire on. Start at the valve, work around, keep the tire centered. Spin the wheel and adjust tread alignment. Inflate to moderate pressure to press the bond. Let it cure per glue instructions (often 24 hours) before full use.
Some riders use tubular tape instead of glue. Follow the tape maker's instructions. Tape is cleaner but gives less working time.

Conclusion
Clincher, tubeless, and tubular all work on carbon fiber bikes. Each system offers gains and asks for trade-offs. Clinchers win on cost and quick fixes. Tubeless tires cut flats and smooth the ride, but require regular sealant checks and a proper setup. Tubulars give a classic light feel and strong cornering, but they demand glue skill, higher spend, and patience.
If you race crits or ride long mixed-surface events, tubeless tires are likely a good fit. If you train and commute and want cheap, clean fixes, clinchers make sense. If you are a pure racer or a purist who loves the feel and can handle the upkeep, tubulars still call your name.
Look at your roads, your time, and your budget. Count not just the speed gains but also the minutes you lose fixing flats or gluing tires. The best system is the one you will keep in top shape and trust when you roll out each morning. Share your own experience with other riders or talk to a shop that knows carbon rims well. The right choice helps you ride more and worry less.